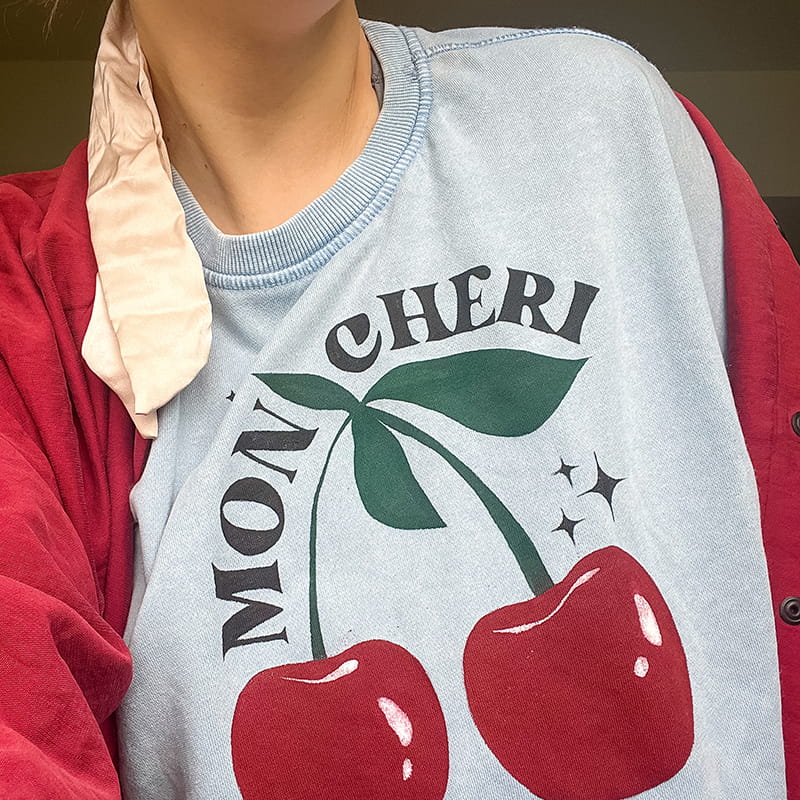
How to cover a stain on your favorite shirt? DIY custom design on a t-shirt in just a few minutes!
Unfortunately, not all dirt and stains can be removed with chemicals. Some damage is so permanent that we are left with a choice: throw away the clothes or remake them? Alterations do not have to be difficult and time-consuming. Sometimes all you need are a few things you have at home and a few minutes of free time! Today I will show you how to create your own template at home in less than 5 minutes!
WHAT WILL YOU NEED?
- an old T-shirt, sweatshirt or jacket – simply clothes that need to be altered!
- printer
- creative / upholstery knife
- 1-2 brushes
- acrylic fabric paints – any quantity and colors
- kitchen sponge
OPTIONAL:
- palette for mixing colors
- paper tape
Step 1: Wash your clothes
For the paint to bind properly, you should paint on clean clothes, so before starting the project, wash your clothes as you usually do.
Step 2: Prepare the template
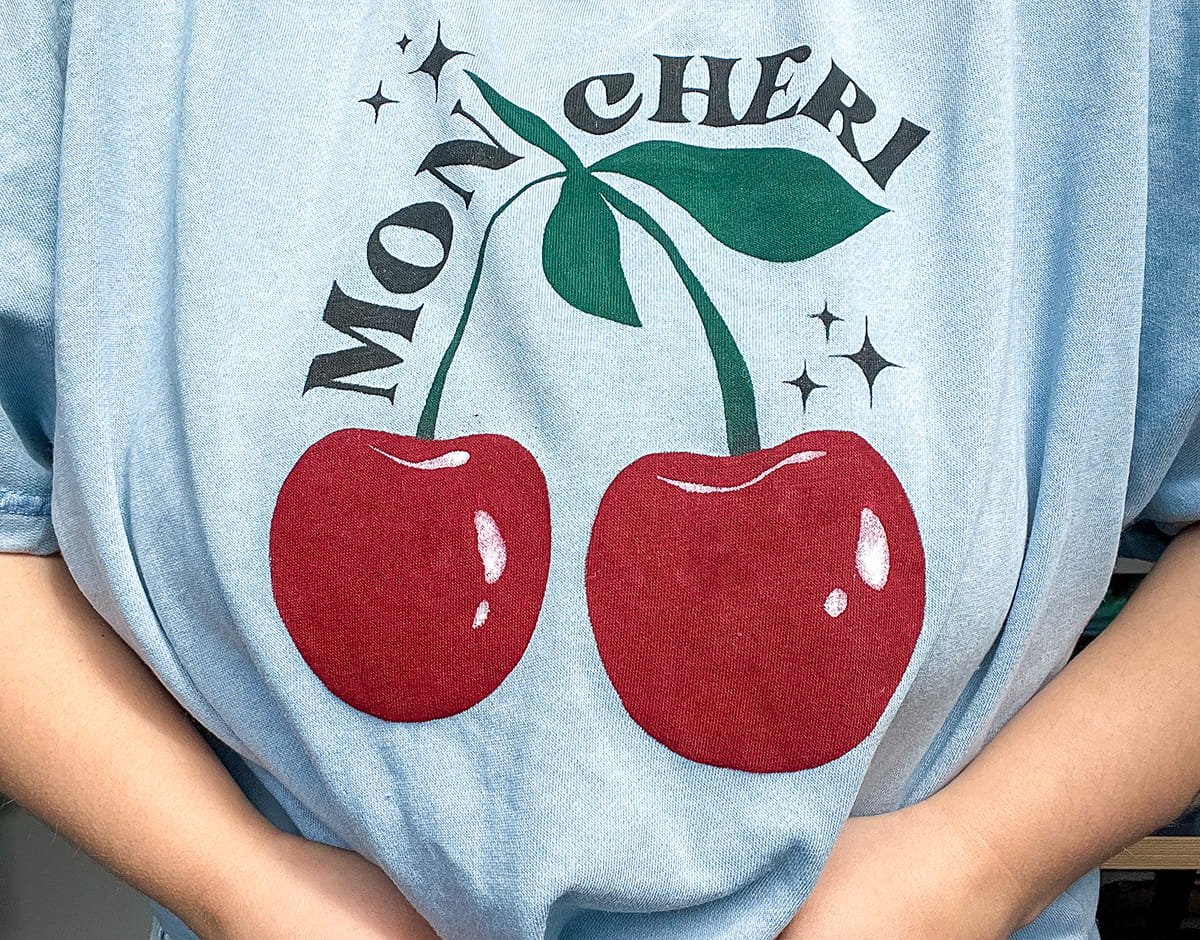
If you have graphic skills, you can create the design yourself. If not, find a sign you like online and print it. A very easy and free design program is Canva. There you will find a lot of patterns and fonts that are ready to use and create something simple for your t-shirt! You can do it even if you have no experience in design.
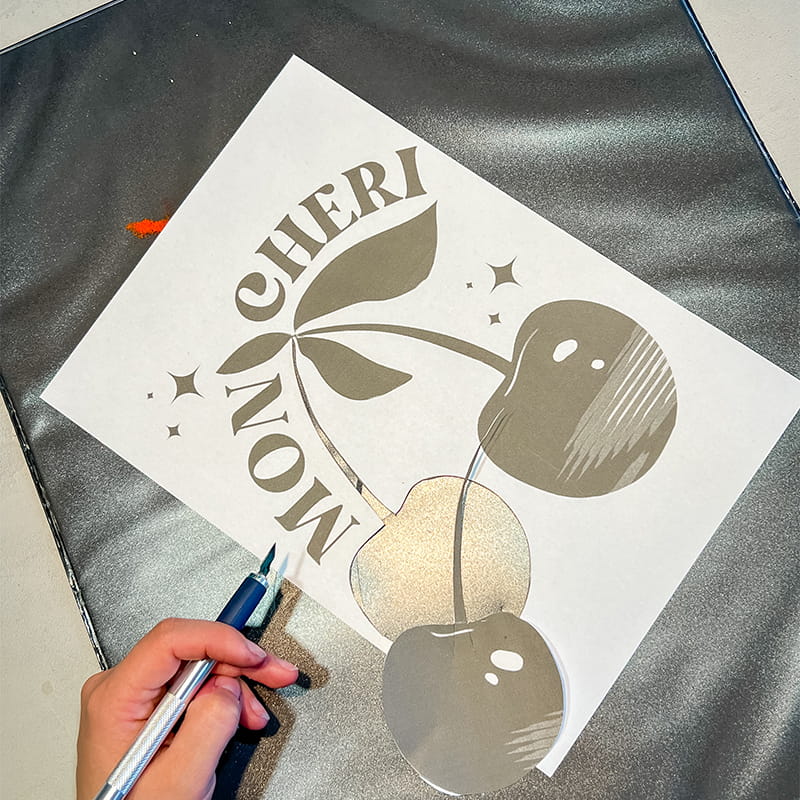
Print the finished graphic and cut out the template with a knife (preferably on a pad or board so as not to scratch the countertop).
Tip: Look out for problematic letters like “a”, “o” or “d”. Do not cut out such letters completely so that they have a “belly” left.
Step 3: Painting
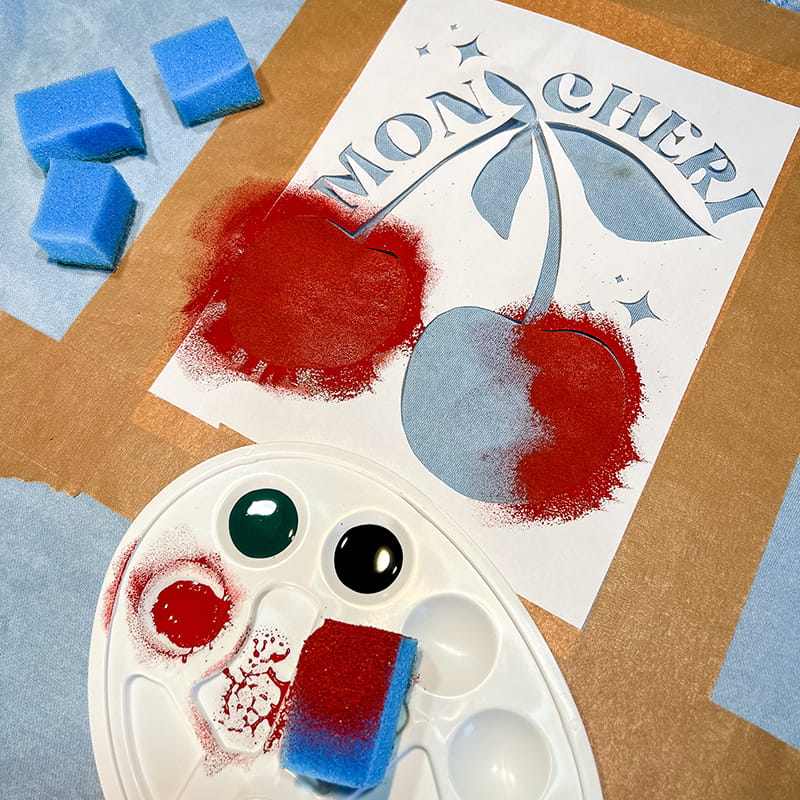
Lay the washed and dry clothes on something hard and flat. It can be a countertop, a board, a pad. Find the perfect pattern placement. You can secure the template with paper tape so that it does not move while stamping. Cut the sponge into smaller parts to make it easier to use and to reflect small pattern elements. Gently stamp the pattern. Do not press the sponge hard, apply the sponge with the paint gently so that the pattern is evenly covered and nothing gets under the stencil. You can repeat this process several times. It is better to apply several thinner layers than one too stiff and thick one. Thick coatings tend to crack and crumble, but you want a flexible, very durable effect.
Tip: Before using the paints, shake them well to mix the pigment well
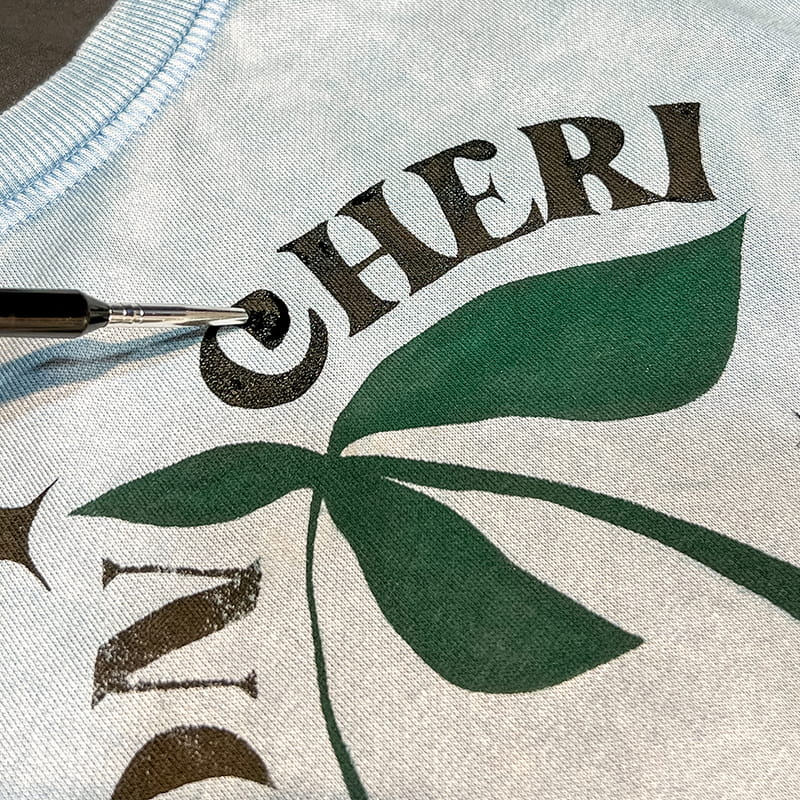
Step 4: Corrections
Once you have achieved the desired effect, very gently remove the template from the T-shirt. Where the pattern requires corrections, make them using paints and a thin brush. In some places the stencil was too visible or uneven? This is normal, it should always be corrected manually.
Step 5: Securing the painting
When you’re done working, hang the T-shirt to dry completely. Depending on what paints you use, this time will vary. I usually wait at least a day, but all you need to do is read the instructions on the packaging. Manufacturers always include information on how to use paints and chemicals on the labels. Usually they do not differ much from each other, but sometimes there is a significant difference, so it is worth reading these instructions before painting.
After the designated time, thermally secure the painting. All you need is an iron and a cloth, another T-shirt or baking paper. Cover the pattern with paper or fabric and fix it with an iron for 4-5 minutes.
After this treatment, you can wash the clothes by hand or in a washing machine, inside out, at a maximum of 30 degrees C.